Adobe Illustrator is a software program that allows anyone to create vector images. Engineers, artists, professionals all use to create vector images in any shape size or form. These images that you can create in Adobe Illustrator can be made into logos, posters, name tags, and even can be used to laser engrave it onto a object.
Creating Key Chain
|
Step 1
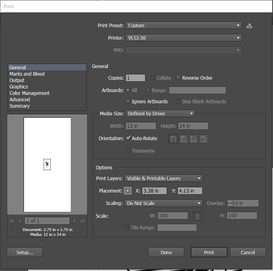
The first thing you need to do is open a new file and then select the print button on the top left ribbon on the screen. After that you will need to set up requirements to be able to print. You need to change you units to inches and make the width 2.75 inches and the height 1.75. Then most importantly the color mode must be RGB Color. 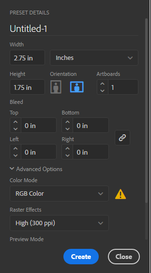
|
Step 2
After you press create you will have a 2.75 by 1.75 work space to make your key chain. You can select the shape button on the ribbon on the right side. You will need to create a cutting line around your chain that is red and a stroke off 0.0001 Then you can use those tools to create engrave designs on your key chain in black. 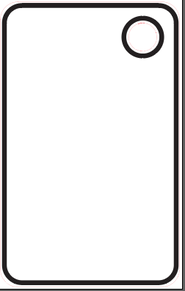
|
|
Step 3
You also have to option to copy and paste onto your chain but you must search black and white clip art after of what you are searching. Then you just paste your image and make it a vector image and change it to how you want it to look. 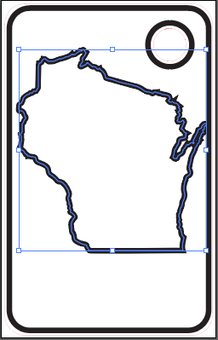
|
Step 4
After you create the design you want you can add text to your design by clicking on the big T tool on the ribbon on the right side of your screen. You have the option to change the fount and size but when you are all done making text how you want left click on the mouse and select create out lines so the text can be a vector. 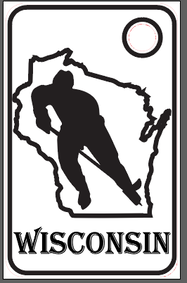
|
Step 5
After a few adjustments that are needed to make your design perfect you are all ready to print your design using the laser.
After a few adjustments that are needed to make your design perfect you are all ready to print your design using the laser.
UNIVERSAL LASER
|
Step 1
After you are done designing your key chain you need to open the Illustrator file on the computer that is set up for the laser. Open file, then print and select the printer that you are sitting at it's either VLS6.60 or VLS3.50. Then press setup and go to preferences. |
Step 2
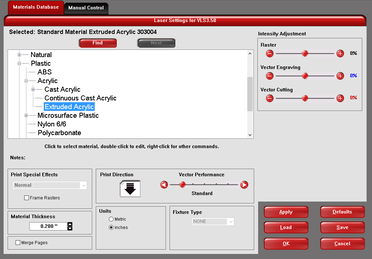
Next you will need a digital caliper to measure the thickness of the acrylic that your laser is going to be cutting. After you have found the thickness you will need to select the material you are using witch is Extruded Acrylic. |
Step 3
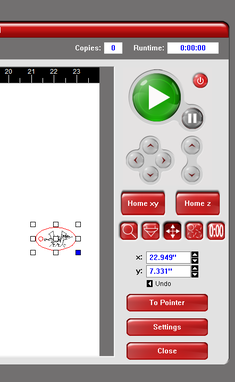
Now turn on the laser and make sure the EXHAUST IS ON and aline your material with an edge on the laser base. With your image on the screen use the tools below the play button to line up one of the corners of
|
Step 4
After the laser is aliened onto your acrylic you can shut the
|


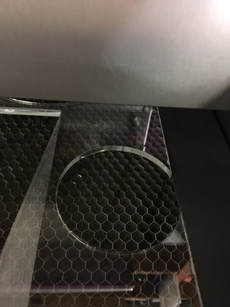
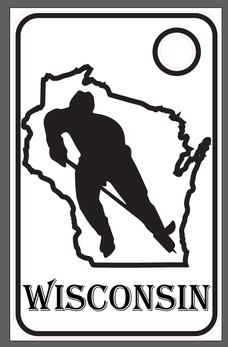
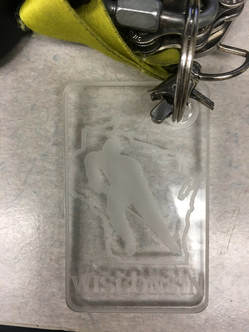
Final Product
VINYL CUTTER
|
Step 1
Load the vinyl making sure you line up the vinyl with the wheels Then flip up the purple lever to put down the wheels Make sure the roller wheels are on the black roller areas 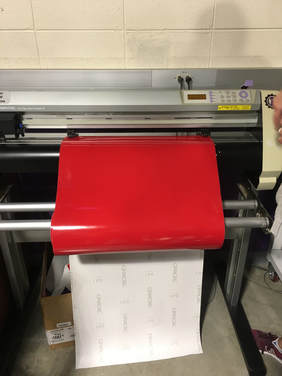
|
Step 2
Press the button next to “Roll-1 front set” . Then press Enter. Once the cutter head has measured the vinyl check to see if the screen says whats bellow. 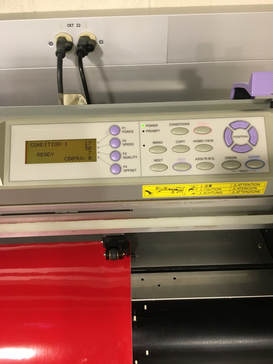
|
|
Step 3
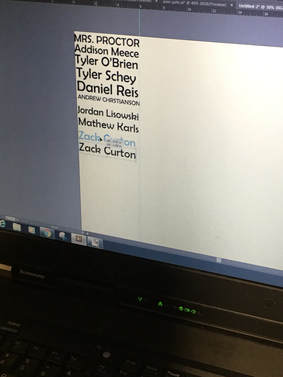
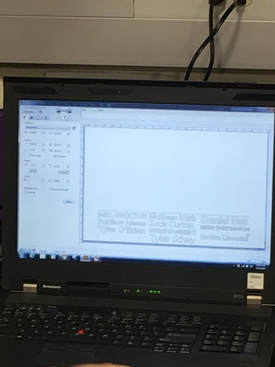
Create you name onto the screen with the text tool and pick a bold font to it is easier to transfer in later steps. After you name is done left click and change it form a raster image to a vector image. |
Step 4
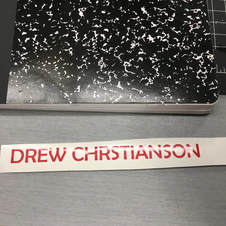
Check location to make sure your decal is a direction it will use the least amount of vinyl. Then hit send and once finished use the blade to cut a straight edge to remove your vinyl. |
|
|
|
Step 5
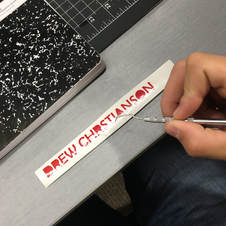
After your name has been cut out use a dental tool to remove the access material. Be careful not to rip any of your letter.
|
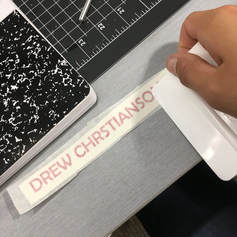
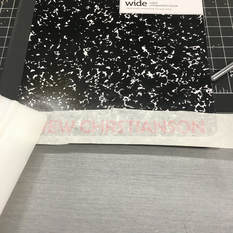
Step 6
Now that the access material is removed, cut a piece of transfer tape and cover your name. Then use a squeegee to apply pressure for a good stick. Then remove the backing press down on your note book and remove the tape carefully. Once your name on there use the squeegee again on the letter.
|
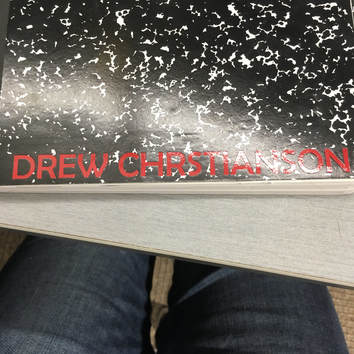
Final Product
Until these two tasks I have never used Adobe Illustrator. But now after these two projects I have learned a lot. How to use a laser and other machines to create awesome objects and how to create cool images on illustrator. Most importantly while I was learning how to use these awesome machines and programs I had a lot of fun and can't wait for the next project that use them.
